Jeeps possess a unique charm, with a rugged appeal that captivates the hearts of many. A large part of this charisma lies in the fact that their doors can be removed, providing a distinctive off-road experience. However, removing the doors of a jeep is not as simple as it might seem at first glance. It is a process that calls for a certain level of technical know-how and the right set of tools. In this discussion, we will delve into the basics of Jeep construction with a particular focus on how the doors are engineered. We will explore the mechanisms that keep the doors securely fastened – the torx screws, the door pins, and the nuts. Once we equip ourselves with this knowledge, we will gather the requisite tools, including a torx screwdriver and a wrench, in anticipation of the door removal process. Our journey will navigate us through a comprehensive, step-by-step guide to removing the jeep doors safely and efficiently.
Understanding Jeep Door Removal
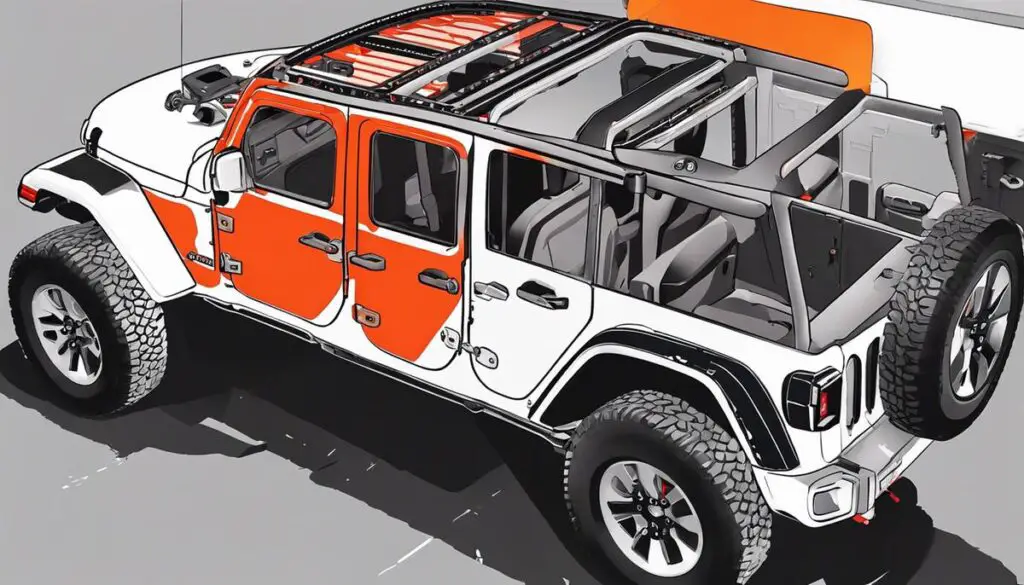
Mastering the Art of Jeep Door Removal: Everything You Need to Know
Welcome to the world of Jeep modifications and customizations, where each tweak or addition not only reflects individual style, but also opens up a world of exciting off-road experiences. One of such unique experiences is enjoying a doorless ride, a joy known well by passionate Jeep owners. However, before one plunges into this adventure, it’s essential to know how to properly remove jeep doors. So here’s a quick, concise guide with everything you need to know before removing jeep doors.
-
Gauge the Door Weight:
It’s worth noting that Jeep doors, especially those on more recent models, can be considerably heavy. Be prepared to handle between 50 to 75 pounds of weight, and always practice safe lifting techniques to avoid any strain on your back.
-
Know Your Tools:
To successfully remove Jeep doors, all you need is a single Torx tool which comes with most Jeep Wranglers. The Torx T-50 bit is typically needed for removing the doors, although some older models might require a Torx T-45 bit. It’s essential to have the right tool so you don’t end up damaging the door hinges.
-
Put the Window Down:
Before starting the door removal, always make sure the window is rolled down. This provides a much safer and secure grip on the door during the removal process.
-
Disconnect Interior Wiring:
Disconnecting the interior wiring is a vital step before removing jeep doors. This wiring typically provides power to windows and mirrors. To disconnect it, first, unhook the locking tab and then gently pull the wiring connection apart.
-
Remove the Door Hinge Nuts and Bolts:
Remember that the door is mounted on hinge pins, which are held secure by nuts. Once the interior wiring is disconnected, use the Torx tool to unscrew the nuts and bolts from the door hinges.
-
Lift off the Door:
After successfully removing those bolts, lift the door off the hinges. It’s recommended to gently sway the door back and forth, breaking any paint seal that may exist and making the doors easier to lift.
-
Store the Doors Carefully:
Now that the doors are removed, they need to be properly stored. The removed doors should be placed in a secure, dry area with adequate padding. This prevents any damages or scratches to the doors while they’re not in use.
-
Zone out the Laws:
Before taking the Jeep out for a spin, it’s crucial to check local road traffic laws since some areas prohibit driving without doors.
That’s it! While removing Jeep doors might seem like a daunting task initially, it’s truly a simple process with these steps above. Now, go ahead, enjoy the thrill of a doorless ride, and let the spirit of adventure take over. Happy Jeeping!

Acquiring the Right Tools
Title: The Essential Gear for Effortless Jeep Door Removal
Every Jeep owner knows the thrill of door-off driving, feeling the open air and breath-taking ruggedness that come with the adventurous spirit of this iconic vehicle. But to truly enjoy this experience, having the right tools on hand is a definite game-changer! Please remember, these instructions must be followed methodically to avoid damaging not only the vehicle but also to ensure personal safety.
To remove Jeep doors, a basic tool kit is often sufficient. The most essential requirement is a T-50 Torx Bit. Typically, the door hinges on modern Jeeps are fastened with T-50 Torx bolts. This specific bit size provides a snug fit, ensuring the easy removal of bolts without stripping them. The correct bit will also prevent damage to the hinge or surrounding body paint.
For leverage and ease of use, a ratchet with a long handle is recommended. This tool will aid in turning the T-50 Torx Bit, removing the hinge bolts with less effort. The extra length on the ratchet provides adequate leverage to loosen the bolts easily. This added ease can make all the difference when dealing with stubborn bolts which can sometimes be a frustrating endeavor.
Next on the list is a low-profile creeper or a mechanics pad. This item is used for lying on while seeking an under-door perspective, especially when dealing with wiring harness for power windows or power mirrors. Using a low-profile creeper or a mechanics pad can greatly increase comfort during this process.
Next up is a set of door hangers or a wall-mounted door storage rack for storing removed doors. These items may not literally participate in the removal process but play a critical role in ensuring the doors are safely stored without causing any damage or unnecessary clutter in your garage.
For those who own a Jeep Wrangler JK or JL with a power package, a set of Mopar door removal tool kits would be useful. This kit includes a trim panel remover and a set of lifters for disconnecting power cables. It also comes with a T-50 Torx Bit, and the lifters make it easier to disconnect wiring plugs.
One optional but helpful tool is a door removal tool, sometimes called a door holder or lifter. This tool helps in lifting off the door with less physical strain. It may not be a necessity but can often prove handy, especially for those who may not be comfortable with the weight of the doors.
So there you have it – elucidation of the tools necessary for a successful Jeep door removal and storage warranted for that envied open-air driving experience that’s synonymous with Jeeps! Don’t forget to invest in quality tools and remember, while removing Jeep doors, patience and safety should always go hand in hand. Happy Jeeping!

The Removal Process
Let’s continue our Jeep door removal journey, propelling you further into the world of Jeep customization!
Once you’ve got everything prepped and your tools at the ready, you’ll want to focus your efforts on unhinging the doors. Remember, handling this task with the utmost care and caution is essential. Too much force or a false move can cause damage to both the door and the hinges.
Locate the bottom door hinge. There, you’ll find a nut holding the door in place. Use your T-50 Torx bit to carefully unscrew this nut. Repeat the process for the top hinge. Ensure you have a safe place to keep these nuts, as they can be easy to lose.
With the nuts removed, it’s time to separate the door from the Jeep. Individuals often struggle with door removal due to the high tension in the hinges. Overcoming this issue is achievable by introducing a little wiggle action. Carefully move the door back and forth while slowly lifting it. You’ll feel the door start to rise. As it does, continue the wiggling and the upward motion simultaneously.
Safety first as you are doing this. Do make sure to keep your back straight, and lift with your legs rather than your back. A helper can provide an extra set of hands here, or for complete independence, use a door removal tool or lifter – especially beneficial when dealing with hefty Jeep doors.
Now, what more exciting transformation could there be than seeing the familiar body of your Jeep suddenly going doorless? It’s probably the time you’ve been waiting for. As you remove the doors, remember to keep the hinges aligned to keep the process as smooth as possible.
After all doors are successfully removed, there comes the question of where to store them. Proper door storage is absolutely crucial to maintain the door’s condition and to keep your workspace organized. Door hangers or wall-mounted storage racks can prove to be a fine investment.
In conclusion, the process of door removal might look daunting, but it’s genuinely simpler than it appears. Know your tools, understand the process, keep hasty moves in check, and you are all set to rock that doorless Jeep look. Jeep customization is not just about creating an aesthetic visual appeal, it’s about making the ride your own while embracing the journey leading up to it. Enjoy the ride!

Learning how to effectively remove Jeep doors requires an understanding of the vehicle’s construction and a certain degree of handiness with tools. It’s important to have a decent grasp of how the door mechanisms work, including the purpose of torx screws, door pins, and nuts. With the right tools at hand, the process becomes easier and straightforward. The tools can include common ones like a torx screwdriver and a wrench, or more advanced ones like a power drill depending on your comfort level. The actual process of door removal, while intricate, can be smoothly accomplished with patience and attention to detail – from opening the door, through to removing the straps, unscrewing necessary parts, and lifting the door off its hinges. Remember to store the doors safely to avoid damaging them once they are off the jeep. Mastering this skill enhances your ownership experience and totally transforms your off-road adventure.